¶ Docker
Docker is a tool that the club leverages to develop faster. In order to be useful, each member needs to know some basics. Hence this tutorial! To fully comprehend this tutorial, it is recommended, but not necessary to have some knowledge of the Linux terminal. The tutorial uses VScode as its IDE which is the recommended tool by the club.
¶ Docker
¶ Why do we need Docker
Linux is an operating system like Windows and is used by a lot of robotics engineer for many reasons. Just to name a few : it doesn't require to buy a license, it has a smaller footprint and it embraces the open-source mentality.
The average person owns a Windows computer. To make it possible to run Linux programs, there are several solutions:
- Dual boot
- Virtual machine
- WSL
- Docker with WSL
The last solution was selected by the club because a container (managed by Docker) can be shared more easily between members since a Docker image can be very small. Some are only a few MB. The computational power loss is negligible and can often be avoided.
¶ General description
Docker is an open platform for developing, shipping, and running applications. Docker enables you to separate your applications from your infrastructure so you can deliver software quickly. With Docker, you can manage your infrastructure in the same ways you manage your applications. By taking advantage of Docker’s methodologies for shipping, testing, and deploying code quickly, you can significantly reduce the delay between writing code and running it in production. Source
In other words, Docker is like a tiny virtual machine that contains only what you want and runs the desired version of the Linux operating system. This allows the club to run ROS2 and Gazebo without having a full virtual machine or a Linux computer. Docker is also used to avoid environment problems. You can share your Docker image with almost anyone and it will automatically work. (You don't need to install 1000 software dependencies and lose 2 days of work to fix your installation...)
Note : Docker is the application that allows you to run a container which is the Linux environment that you want. Each container is based on a Docker image.
¶ Installation
Docker is compatible with Windows, Linux and Mac. You can select the right version and follow the tutorial on the official website.
For Windows installation, you must also install WLS2. The installation process will provide all steps needed in order to do so. You may need to restart your computer.
¶ Run your first container
Docker can be run via the graphical application or via the terminal. In this tutorial, we will mainly focus on the use of the terminal.
To check if Docker is correctly installed, open a terminal and enter the following command : docker --version
If you have a return value that looks like this : Docker version 20.10.17, build 100c701 , you are good to go ! If you don't, try to find why on stackoverflow.
To start a container, you must start with a Docker image. The first step is to get the base image from the Web. There are several sources to fetch a Docker image, but the most popular is docker hub. On this site, you can find an image that has ROS2 already installed.
The first container that you will try is the one provided by the open source Robotics Foundation. To download it, enter the following command in a terminal :
docker pull osrf/ros:humble-desktop
This command will download the lastest ROS version. Next, to start the container, enter the following command :
docker run -it osrf/ros:humble-desktop
That's it! You are in a Docker container and you can run Linux and ROS commands! To test that you really have Docker installed, enter the following command : ros2
¶ Running multiple containers
With Docker, it's easy to run multiple containers that are based on the same image. You just need to open a new terminal and enter the same command as before. Once it's done, you have two separate containers that are not related to each other. If you create a folder in one container, the other one will not have that folder.
This can be problematic because it means that everything that you do in a Docker is not saved and once the container is no longer running, you will lose all your changes. Later in this guide, you will find a way to avoid that data loss.
Each container can communicate via Network to the localhost. Because of that, you can run a ROS node that will publish or subscribe to another Docker container in the same network.
Enter in the first container the following command :
ros2 run demo_nodes_cpp listener
Enter in the second container the following command :
ros2 run demo_nodes_cpp talker
To Quit a command in a container, you can hit Ctrl + c.
To Exit a container, you just have to write exit and press enter.
You can find more informations about ROS and Docker on ROS2 wiki.
As an exercise, try to run multiple listeners or talkers.
¶ Main option
This section is a summary of the official documentation. It only contains informations relevant to the club.
To learn Docker, you only need to know 4 commands:
docker pull : This command allows you to download a Docker image from a server.
docker pull [Image:tag(version)]
docker run : This command allows you to start the container.
docker run [Options] [Image:tag(version)] [Command to send to the container]
Options :
- -it : Allows you to enter in the interactive terminal mode (That way you can have access to a terminal);
- -d : Allows you to run a detached container, which means that the container will run in the background and you won't see the informations about it in the current terminal;
- --name : Give a name to the container. That way, it's easier to execute it from another terminal.
docker exec : This command allows you to enter a command in a running container.
docker exec [Options] [Name of the container] [Command to send to the container]
- -it : Same as the run command.
To get the name of the container, you can enter the command
docker ps. Every running container will be listed. If you don't see yours, it means that it's not running.
docker build : This command allows you to build your own container based on a dockerfile (will be explained later).
docker build [Options] [source file repository]
- -t : Name of the image that you are building.
¶ Dockerfile
A Dockerfile is used to build custom images. In the Dockerfile, you can specify which base image is going to be used, which application will be installed and also specify the environment variable.
To better understand what you can do, here is an example :
# Base image, where does the initial container came from
FROM osrf/ros:humble-desktop

# Setting an environnement variable that you can use later in the file or in the app.
# This variable represents the ros2 workspace
ENV ROS2_WS /home/ros2_ws

# Create the workspace. By default, the folder doesn't exist.
RUN mkdir -p ${ROS2_WS}

# Specify the working directory to be the ros2 workspace.
# The workdir is the place where the command will be entered.
WORKDIR ${ROS2_WS}

# To be able to build the image with the code, you must copy the code into your container.
COPY . ${ROS2_WS}/src/capra_listener

# Build the package using colcon (ros2 default package builder).
# The option --symlink-install allows you to make some changes to a python node without having to rebuild the package.
# You only need to restart the node.
RUN colcon build --symlink-install --packages-select capra_listener

# When you build a new package, you must add it to the setup.bash to be able to use it.
RUN echo "source install/setup.bash" >> /opt/ros/$ROS_DISTRO/setup.bash
In a Dockerfile, the keywords are in capital letters and the default command language doesn't include bash. Which means that you can't run commands such as source directly.
¶ Monitoring and usefull commands
Docker comes with a lot of usefull commands to get some informations about your images and containers.
docker ps : This command allows you to see every running container. This is usefull if you want to know the name of a container or if you want to check if your container is still running.
docker ps -a : This command allows you to see every container, even the ones that are not running.
docker stop [image name] : This command allows you to stop a container.
docker rm [image name] : This command removes a container that is stopped.
docker images : This command allows you to list all available images on your computer. Docker will always prefer a local image to a remote one.
docker rmi [image name] : This command removes an image from you computer.
docker system prune -a : This command cleans all your unused docker images and frees some space. This is a useful command, because when you start creating containers, the space used by them can add up quickly.
docker stats : As the name suggests, this command gives you the current stats of each running container.
¶ Docker-compose
If you want to launch multiple Docker container images at the same time, you need to open multiple terminals. While this may be a solution, the alternative is to use a tool called docker-compose.
Docker-compose allows you to build and run multiple containers much more easily. Docker-compose uses by default a file named docker-compose.yml to build the container system.
Like Docker, there are multiple commands that you can run with docker-compose.
docker-compose [Options] build : This is the command that will build each container specified in the configuration file.
docker-compose [Options] up : This is the command that will start each container specified in the configuration file. It is the equivalent of the run command of Docker.
The main option is the name of the configuration file. If you don't specify a file name, docker-compose will try to look if there's a file named docker-compose.yml in the repository where the command is used.
To specify the name of the files, you can use the -f option.
Example :
docker-compose -f docker-compose.somefile.yml build
Here is an example of a docker-compose configuration file. Please read the comments in order to comprehend every line.
# Specify the version that the docker-compose tool will use.
version: "3.9"

# Each configuration file starts with service
services:
    # Name of the service (running container)
  ros_capra_talker:
  	# Specification of the container.
    # Where to look for the dockerfile. You can also use and image directly.
    # If you write an image name, it will not be rebuilt each time that you build the system.
    build: ./src/capra_talker/
    # Command to run when the container will start.
    command: ros2 run capra_talker talker
    # The volume is a command storage space that can be accessed from multiple containers or even the host.
    volumes:
      - ./src:/home/ros2_ws/src

  ros_capra_listener:
    build: ./src/capra_listener/
    command: ros2 run capra_listener listener
    # ./src is the local space.
    # /home/ros2_ws is where the local space will be mapped to the container.
    volumes:
      - ./src:/home/ros2_ws/src
    # Yay, you made it to the end of the file!
To test the system, you can use a Git repository that has been made for this tutorial.
To get the code, copy the following link :
https://github.com/clubcapra/docker_ros2_template.git
Open VScode and use the following image to get the code.


Once you click on the proposed URL, a window will appear and you must select where you want the code to go. Once you have selected a repository location, another window will appear and propose you to open the previously cloned repository. You must select open.
You should see the following file structure :

As you see, there are three yml files that are starting with docker-compose. Those files contain different combinations of containers that will do different tasks. You can explore each of them. The one that will interest us in this part of the tutorial is docker-compose.yml.
In the folder named src, you can find many ROS packages. In each package, you can find a dockerfile. Take a minute to observe each dockerfile and observe what are the commands used in those files.
To start the Docker system, open a terminal in VScode and enter the following command :
docker-compose build

Once the system is done building the image, enter the command to start the system:
docker-compose up
You should see some ROS node starting to publish and receive a message. To stop it, you can hit Ctrl + c.
Normally when we use Docker, everytime we want to modify something in the code, we would need the build the Docker image again. Since we use Docker volume, we can edit the code directly in VScode. To try this, you can open the file /src/capra_talker/capra_talker/publisher_member_function.py and change the 32nd line to make the talker publish another message. When you're done, save the file, and start the docker system again using docker-compose up without building the system.
The fact that we need to restart the Docker system to change the message is a limitation by ROS. When we change a ROS node, we need to restart it (or rebuilt it if we don't use the --symlink option) to apply the change. When you modify a local file that is part of the storage, the file in the container is directly modified.
¶ How to see a GUI using Docker
Install the x11 server:
https://sourceforge.net/projects/vcxsrv/
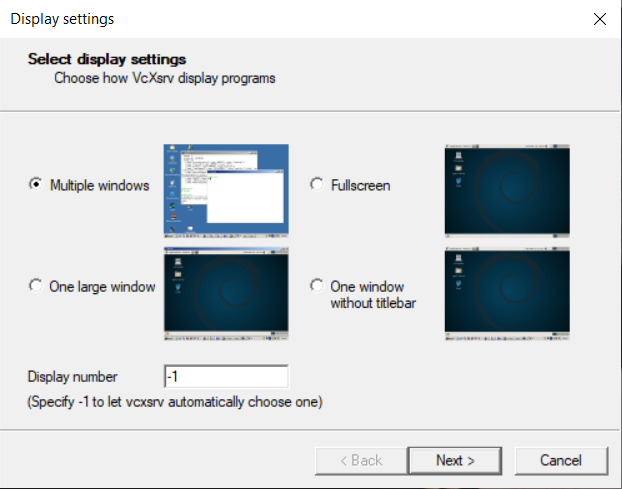
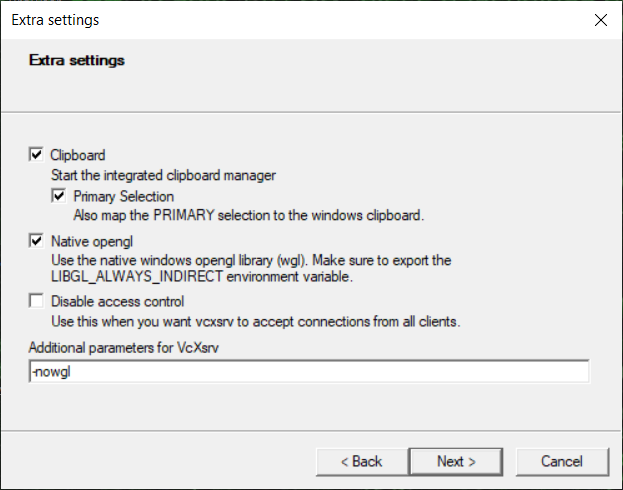
Once the x11 server is installed, you must launch it with the shortcut that has been created on your desk. The starting process should look like this :

Don't forget to add : -nowgl
To test the server, you can use the template repo and launch turtlesim. Turtlesime is a part of the ROS tutorial.
In the same terminal as the one with docker-compose, enter the following command to build the Docker system :
docker-compose -f docker-compose.turtle.yml build
Use the following command to start the Docker system :
docker-compose -f docker-compose.turtle.yml up
Two windows should open. The first is an application that contains a turtle. The second one is rqt which is a tool that allows you to communicate to ROS. You can send a command to control the turtle via rqt if you are familiar with the tool. Otherwise, you can enter the following command in a new terminal (it doesn't matter where the terminal is) :
docker exec -it docker_ros2_template-ros_turtle-1 bash
Then, in the container, you can start a teleop operation from the ROS2 tutorial :
ros2 run turtlesim turtle_teleop_key
This command allows you to control the turtle using the keyboard arrows. You can find more informations about turtlesim on this site.
If you want to do the ROS tutorial and a graphical interface is needed, you will need to add two parameters to your Docker command. (-v and -e). That way, you will be able to start a graphical application (as long as X11 is running).
Example with osrf/ros:humble-desktop :
docker run -it -v /tmp/.X11-unix:/tmp/.X11-unix -e DISPLAY=host.docker.internal:0.0 osrf/ros:humble-desktop.
¶ Simulation in Docker
You can also use the Gazebo Simulator with the method shown in the previous section. To run Gazebo, you can use the docker-file that has been given as an example:
docker-compose -f docker-compose.gazebo.yml build
Gazebo will take some time to install at first. Once the buidling part is done, you can start the system:
docker-compose -f docker-compose.gazebo.yml up
You can send a ROS command using another terminal. To do that, you must enter the following command :
docker exec -it docker_ros2_template-ros_gazebo_simulation-1 bash
Once you are in the container, you can send twist messages to Gazebo.
ros2 topic pub /demo/cmd_demo geometry_msgs/Twist '{linear: {x: 1.0}}' -1
Change the value after the "x: " to change the speed (and direction) of the robot. You can enter a value from -1.0 and 1.0 . (To stop the robot, you need to enter the value 0.0).